Monday, August 10, 2015

Egg Salad with Dill and Granola Bars

That's a misleading title, isn't it? Feels like I should have inserted an Oxford comma in there somewhere.

It's been a few months since I've posted here...I've been off on other projects for a while.

Here's a recipe for you that I posted on my Facebook page today of dilled egg salad.  I'm pretty sure that posting pictures of  your meals is one of the items on a top 10 list of annoying FB posts (although I see much worse in my daily feed these days).  I'm sorry if you agree with that list, but I spent many years working with food and making it pretty.  It's just what I do, whether I own a restaurant or not.

I found this recipe while surfing around one day, and, quite frankly, after I made it, I was not sure it would be edible.  It wasn't the prettiest stuff you'd ever seen.  If you saw the photo on Facebook, you might have thought the same thing.  It's yellow, and not a pale yellow, either.  This is because there is more mustard than mayo in it, plus a good bit of paprika.  I can tell you, however, if you like egg salad, it is quite good, and I encourage you to give it a try.

I always try to incorporate veggies and fruit into these meals, and since I'm a carb addict, I have to include a few crackers (these are multi-grain club crackers by Keebler - so good!). I've also included these tiny little Champagne grapes that I absolutely adore.

About these grapes....they are an ideal snack.  These tight little clusters of pearl-size seedless grapes are incredibly sweet and full of flavor.

If you study older cookbooks like I do, you may see references to the "raisins of Corinth", which refers to dried Champagne grapes (the Greek port of Corinth was originally the primary source of export for this fruit).  I love those old cookbooks, with their aged sepia-edged pages and handwritten notes from their previous owners.  You can learn a lot about history from them.  It's like taking a step back in time, when cooking was more about practicality instead of the glitzy trend it's become today. That's why I named my restaurant "The Keeping Room" in the first place....to hearken back to those tried-and-true recipes that didn't require lots of fancy equipment and ingredients - those recipes that you already know are going to be good, because you had many of them as a kid at the old homeplace where your grandparents lived.

I got off-topic on that one, didn't I?  Okay, here we go.

Here is the recipe for the egg salad.  Of course, you can modify it to your own tastes.

Ingredients

  • 8 eggs
  • 1 Tbsp. mayonnaise (I added a bit more to loosen the mixture a bit)
  • 2 Tbsp. prepared Dijon-style mustard (I substituted regular yellow mustard, hence that extreme yellow)
  • 1 tsp. paprika
  • 1 tsp. dried dill weed
  • 1/2 red onion, minced (I substituted dried minced onions, about 1-2 Tbsp.)
  • 1/4 cup salad cubes
  • Salt and pepper to taste

Directions

  • Place eggs in a sauce pan and cover with cold water.
  • Bring the water to a boil; cover and remove from heat.  Let eggs stand in the hot water for 12-15 minutes.
  • Remove the eggs from the hot water, cool, peel, and chop.
  • In a large bowl, combine all ingredients.  Mash the mixture enough to be chunky and spreadable.
  • Serve on bread as a sandwich or over lettuce as a salad.


While I was in the kitchen, I whipped up a batch of granola bars as well.


Here's the recipe for these bars.

Granola Bars

Ingredients

  • 2/3 cup rolled oats, ground 
  • 1/2 cup slivered almonds, ground
  • 1/4 cup wheat germ
  • 1 cup rice cereal
  • 1 cup nonfat dry milk
  • 1/2 tsp. cinnamon
  • 1/2 tsp. salt
  • 1/4 cup canola oil
  • 1/2 cup honey
  • 1 tsp. vanilla extract
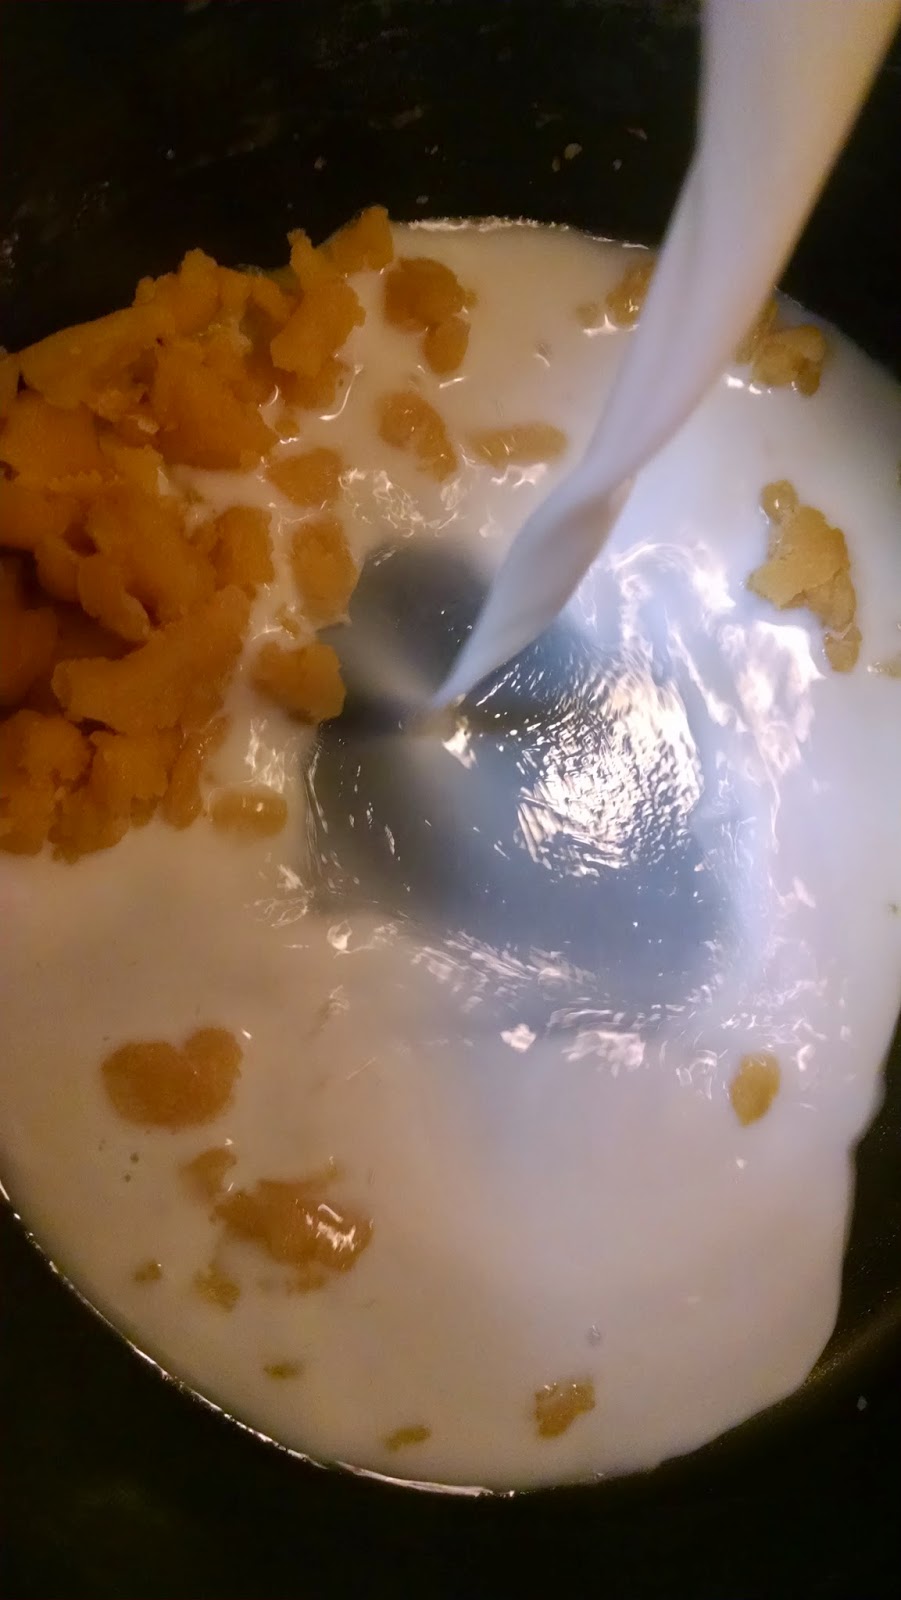
  • 1/4 cup chocolate chips and/or dried fruit

Directions

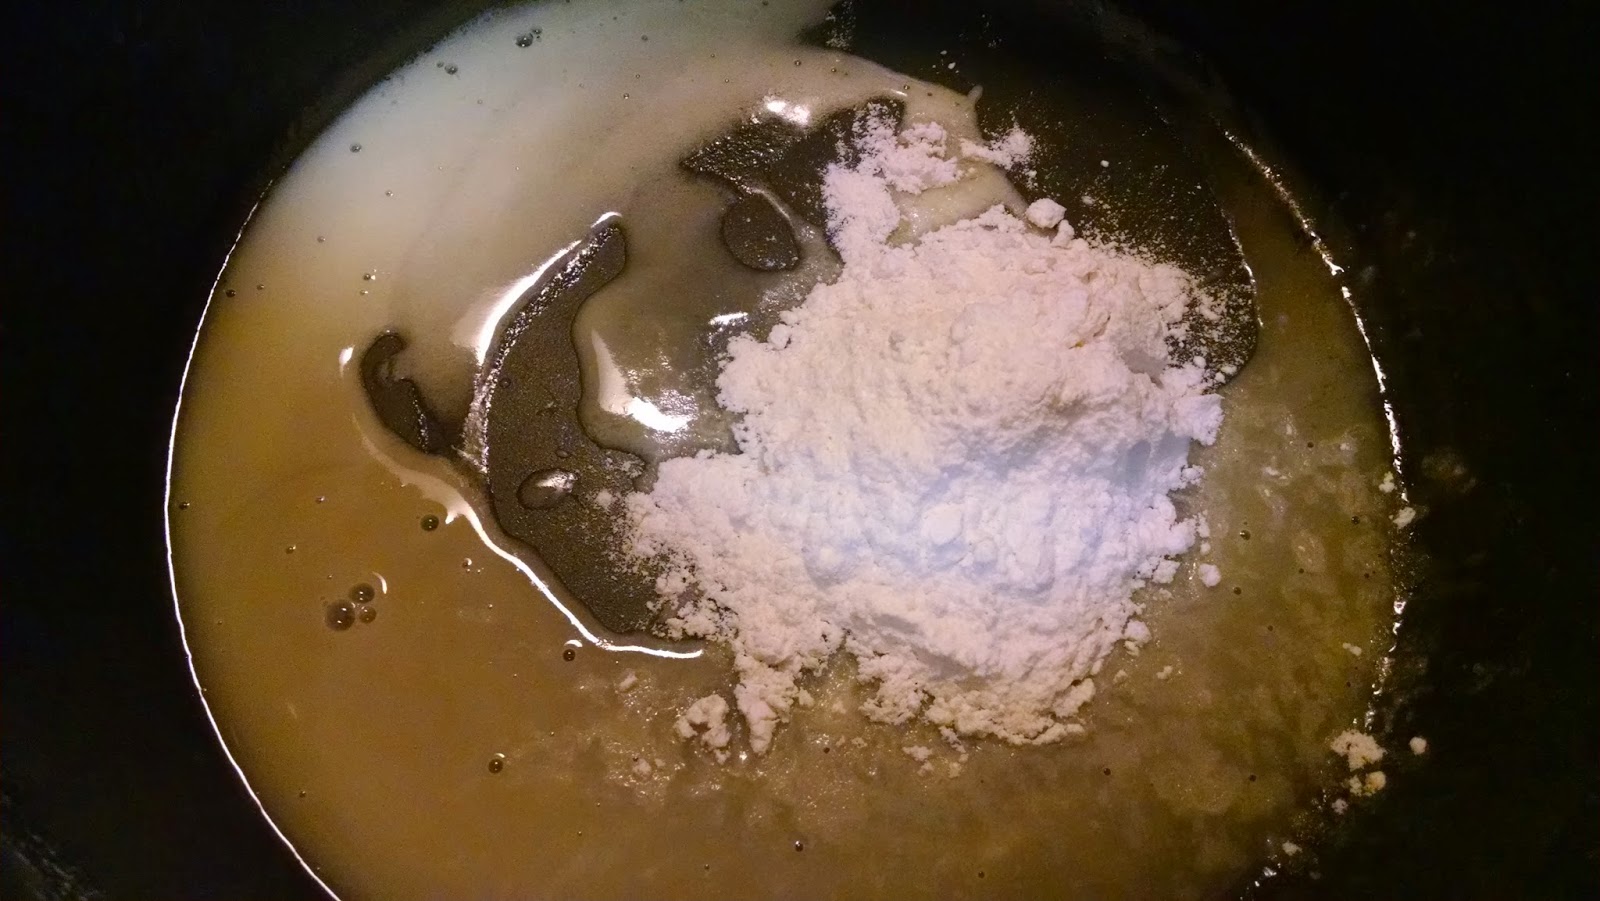
  • Preheat oven to 300F.
  • Grind the oats and almonds in your food processor.
  • Line a 9x13-inch pan with foil and spray with nonstick cooking spray.
  • In a medium bowl, combine all dry ingredients except chocolate chips/fruit.
  • Mix in the oil, honey, extract, and chocolate chips/fruit.
  • Pour into the prepared pan and, using your hands or a small rolling pin, press down, distributing the mixture evenly.
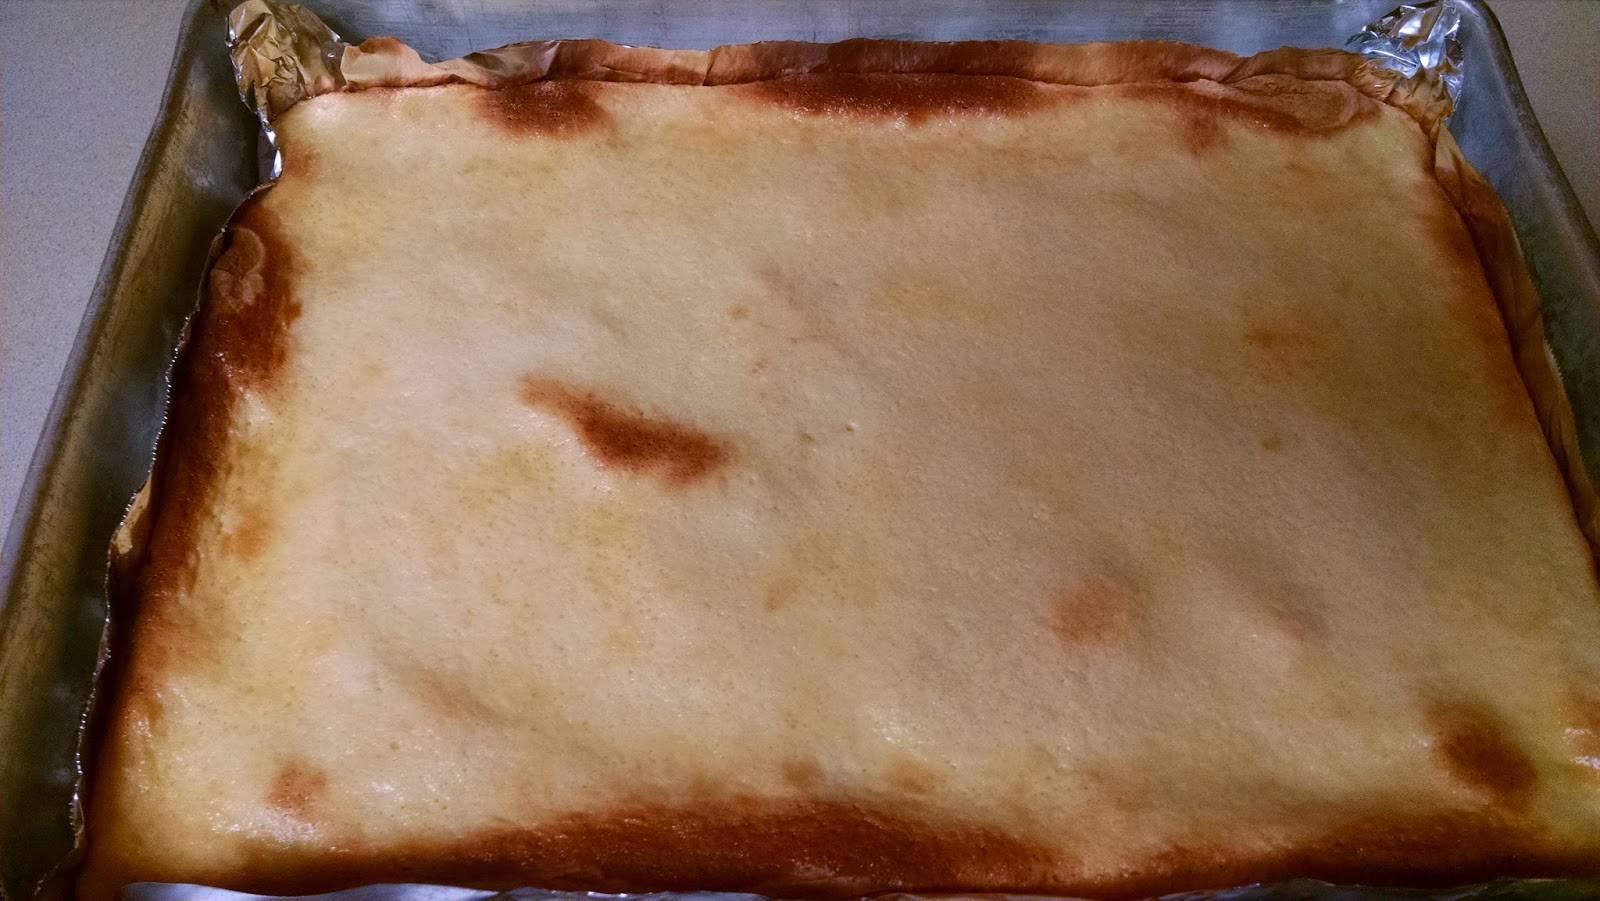
  • Bake for 15 minutes.
  • Cool slightly, then remove from pan, lifting by the foil edges, and place on a cutting board or other flat surface.  Cut while still warm.
  • Store in an airtight container for up to a week or freeze in plastic bags.

I had to substitute pecans for the almonds, and I didn't have any wheat germ.  After cooling completely, they became crispy-chewy.  These would make a good lunchbox snack.

Enjoy!


Tuesday, April 28, 2015

Pineapple Banana Smoothie

This past Christmas, I received a Ninja Professional blender/juicer/smoothie maker.  I had wanted one for a while - my plan was to increase my intake of fruits and vegetables, because I crave (and eat) too many carbs.

Well, it's taken a while (four months) to actually implement those good intentions.  I'm motivated now, you see.  I recently left a job that required me to sit most of the day.  Toss in a half-hour lunch, a one-hour round trip commute, a little snacking (carbs!), and guess what?  Ten pounds magically appeared.  So I'm trying to find my way back to that pre-10 pound state.

When I posted a picture on Facebook earlier today of a green smoothie I'd prepared for my lunch, I thought the less-than-positive comments it received were funny.  (This post is for you guys!)  I get why you'd think it would be awful....first of all, it's green!  And I will admit, I was very hesitant the first time I made one, because...you know...it's GREEN.  However, that first time, I not-so-bravely lifted that spoon with a tiny little amount of green smoothie in it and took a sip.  (Honestly, I felt like a little kid again when my mother would make me take a sip of cough syrup).  I found, to my surprise, that it actually tasted good!  (Unlike that cough syrup.)


Now that the green barrier has been broken, I'm planning to venture a little further past the standard drink I've been making so far.  I'm new to this, remember.  I'm still learning and still experimenting with different ingredient combinations.

Here is the recipe I used today, and a few comments beside each one that may help if you decide to make this for yourself.  You can adjust the quantities of each based on your own tastes.


Pineapple Banana Smoothie

  • 2 cups packed fresh baby spinach/baby kale combo, chopped
    • I used an organic triple-washed blend.  I cut the stems off (you don't have to do this, it's just my preference).  Rinse the leaves.  I know the package says it's been triple-washed and is ready to eat, but WASH IT ANYWAY!  There still may be some residual dirt or "something" on the leaves.  I know this from experience.
  • 1/2 each of a Dole mandarin orange fruit cup and a pineapple tidbits fruit cup (the snack kind that is sold four to a pack) with juice
    • I like the pineapple tidbits in coconut juice best - but they're hard to find.
    • I added a few more (canned) pineapple chunks (about 1/4 cup) to help neutralize the kale taste a bit further.
  • 1 frozen banana*
    • Bananas that are fully ripened before freezing add a creamier texture, plus they enhance the other flavors.
  • 1 scoop of vanilla whey protein powder
  • 1/2 cup almond-coconut milk blend (original, not unsweetened)
Place all ingredients in your blender and pulse.  

This yielded enough for a tall glass, plus about 8 ounces more, which I froze for later.

You can add ice to this, if you wish - maybe half a cup.  I chose not to, because it gives me brain freeze, plus it will water down the drink.  This is cold enough for me with the frozen banana and the refrigerated almond milk.

You can use frozen fruit as well, instead of the shelf-stable fruit that I used here.  You may need to let it thaw just a bit before putting it in your blender.

*To freeze bananas:
  • Use bananas that are overripe and spotty (just as you would for banana bread....oh, carbs!)
  • Peel and cut into chunks.
  • Place on a lined cookie sheet and freeze.
  • Once they are frozen, place in a freezer-safe bag.
Thanks for reading....let me know if you like this recipe, or share your own favorite recipe!


Saturday, September 27, 2014

Baked Macaroni and Pimiento Cheese

Last week I was reminiscing and looking through one of my recipe notebooks from the restaurant.  (I still miss it!) I found a recipe that I'd always wanted to try, but had forgotten about - Golden Baked Macaroni and Pimiento Cheese.  Let's see - macaroni and cheese!  Pimiento cheese!  Two stand-alone favorites - combined they must surely be the epitome of comfort food.

The recipe was on a page torn from a Southern Living magazine, and was originally for an appetizer - Macaroni and Pimiento Cheese Bites - which is why I kept it, but tonight I followed the altered recipe for the casserole. I thought it would be a nice side dish, along with blackened green beans (another new recipe, see below), to have with the rib-eye steaks we were planning to grill.

The macaroni was amazingly good.  We love macaroni and cheese at our house and have accumulated recipes for several favorite versions.  This one goes into our notebook of "keeper" recipes. It was easy to make and baked in only 20 minutes.  As it baked, that wonderful cheesy smell filled the kitchen, and I could hardly wait to take a bite when it came out of the oven.

Here are the ingredients:

1 (8-oz.) package elbow macaroni (about 2 cups dry pasta)
3 Tbsp. butter
1/4 cup all-purpose flour
2 cups milk
1 tsp. salt
1/4 tsp. ground red pepper
1/8 tsp. garlic powder
1 (8-oz.) block extra sharp Cheddar cheese, grated
1 (4-oz.) jar diced pimientos, drained
3/4 cup fine, dry breadcrumbs
3/4 cup freshly grated Parmesan cheese
2 large eggs, lightly beaten *
1/2 cup milk *
Vegetable oil *

* Omit if baking the casserole.

I prepared the pasta earlier in the afternoon per the package directions, rinsed and drained it, and placed it in the refrigerator until I was ready to use it.

Melt the butter in a large skillet or Dutch oven over medium heat.


Whisk in the flour until smooth. 


The flour will actually clump instead of looking smooth, so don't panic when you see this happening.


Gradually whisk in 2 cups milk (I used 2% instead of whole with no adverse results) and the salt, ground red pepper (I used cayenne) and garlic powder. 


Whisk constantly for 3 - 5 minutes or until thickened.  It will blend together nicely.


Stir in the shredded cheese and pimiento until melted and smooth.


Stir in the cooked pasta and remove from heat.

 
Pour macaroni mixture into a lightly greased 9x13-inch baking dish. (Do not chill.)   Stir together breadcrumbs and Parmesan cheese; sprinkle over mixture. Bake at 350F for 15 to 20 minutes or until bubbly.


If you want to try the appetizer version:

Prepare the macaroni mixture per the above directions through the step of adding the pasta.

Line a 9x13-inch pan with plastic wrap.  Allow a few inches to extend over edges of pan. 
 
Pour the prepared mixture into the pan.  After it has cooled slightly, cover and refrigerate for 8 hours.
 
Remove macaroni  mixture from the pan, and cut into 1-inch squares.
 
Combine the breadcrumbs and Parmesan cheese in a shallow dish.
 
Whisk the eggs with 1/2 cup milk in another shallow dish.
 
Dip macaroni bites in the egg mixture and dredge in the breadcrumb mixture.
 
Pour oil to 1-inch depth in a large skillet or frying pan.  Fry in batches for 2 minutes on each side or until golden.
 
 
I have not tried the appetizer version, but if the casserole is any indication, I'll bet they are equally delicious.
 
As for the aforementioned blackened green beans.....they were a complete disaster.  I found this recipe also - I'd printed it from the Food Network - one of Guy Fieri's recipes.  Since we are always looking for new ways to prepare green beans, I thought I'd give it a try.  I blended the spices together (even made a trip to the grocery store because I was missing two spices - isn't that how it always goes?) and followed the directions exactly.
 
After tossing those beans in all those spices (the blend had salt, lots of paprika, cumin, lots of pepper and a few others), I put them in my wok/skillet and let them sizzle.  The pepper smell was almost immediately overwhelming.  Too much!  I could barely breathe. I had to step outside to breathe in some clean air.  I turned on exhaust fans all over the house, opened windows, and ran it all down the disposal to get rid of the smell.  J. did keep a small amount to try, but the beans were so salty that they were inedible, and we quickly disposed of his portion as well. 
 
Blackened Green Beans = Epic Fail.
 
Needless to say, we were without a vegetable to round out our meal, which was disappointing, but the macaroni was so good that we didn't mind so much this time. 
 
I think you'll like the macaroni and cheese.  Give it a try sometime.
 
Enjoy!


Saturday, September 13, 2014

Gooey Butter Cake

Last week, I had a pizza night with my mother-in-law.  For dessert, she made ooey gooey butter bars from a Paula Deen boxed mix.  They were pretty good.

This gooey butter bar originated back in the 1930s in the St. Louis area, and is firm in texture, similar to a brownie in that you can cut it into squares, yet has a pudding-like, or gooey, layer.  There are all sorts of variations and flavors - lemon, pumpkin, chocolate - of this recipe.

Paula Deen has made this particular confection famous in recent years.  I watched her cooking show from the beginning, especially in the early days of my shop, and found that many of her recipes were the same ones that my mother prepared for us when I was a kid.  This dessert - this ooey gooey butter bar - was one of them.  My mother was making these for us when I was in the seventh grade, long before Paula's show hit the airwaves.  We called it by several names - gooey butter cake, ooey gooey butter bars.  I remember thinking it ought to be named something a little more appetizing.  What sounds good about gooey butter?  That word "gooey" put me right off, although it didn't stop me from eating it.

Tasting these bars again made me feel a little nostalgic, and I hadn't made them in a long time, so I pulled out my mother's recipe and decided to make a batch myself.

First, assemble your ingredients.  


For the crust:

1 box yellow cake mix
1 egg
1 stick butter, melted

For the filling:

1 8-oz. package cream cheese, softened
2 eggs
3/4 cup powdered sugar
1 tsp. vanilla

Preheat your oven to 350F.  Prepare a 9" x 13" sheet cake pan.


My sheet cake pan has been used quite often during the past ten years - as have the other three that I have - so I prefer to line it these days, either with foil or parchment paper, before baking in it.   (This is a Wilton pan, which I highly recommend for all your sheet-cake size baking requirements.) 

You can also bake this cake in a 9x13 glass baking dish.  A glass dish will absorb heat faster than a light metal pan, so you will need to adjust the baking temperature down to 325 F.


Combine the cake mix and melted butter in the large mixing bowl of your electric mixer.


Note that I used my trusty dough hook for this job.

Add one egg.


Mix the three ingredients at low speed until combined.  Use a rubber spatula to scrape the bottom of the mixing bowl and fold in any loose cake mix.  Continue to mix until thoroughly combined


It's ooey and gooey.

The cake mixture will be thick and gooey.  I have seen photos of this mix that looks much drier at this point, but the end results appear to be the same.  (Maybe the butter wasn't melted in those recipes.)

Spray the foil lightly with baking spray.  Spread the cake mixture evenly in the pan.  I used an angled spatula to do this (another invaluable Wilton product).  If you use foil to line your pan like I did, you will need to hold it in place as you do this.


Still gooey.

For the filling, mix the remaining ingredients and beat until creamy.


More goo.  Now I get it!

I added them all together at once before giving it much thought, and had a little difficulty completely incorporating the cream cheese, even though it was very soft (at room temperature).  I think I may beat it until it is creamy first when I make this again, and add the other ingredients afterward. 

Spread the cream cheese mixture over the cake mix layer.  The cream cheese mixture will be easily pourable.


Bake at 350 degrees F. for 40 minutes.


Remove from the oven and let cool on a wire rack.  The edges will be lightly browned.  Don't overcook because the cake layer will be "heavy".


Dust with powdered sugar, if desired.

You can see the differences in texture.  The top layer is reminiscent of cheesecake, which must be why I always liked these bars so much.  I am a huge cheesecake fan.  Plain cheesecake.  Thick New York-style cheesecake.  Which I eat maybe once a year, but would love to eat every day.

Paula Deen's recipe is almost identical to my mother's, with one exception:  Paula's uses a 16-oz. box of powdered sugar - about 4 cups - in the filling, while I only used 3/4 cup, which would explain why her bars have a thicker, "gooier" top layer than mine do.  I remember having this with a much more gooey, crackly top than what I made this time.  You can adjust to your taste.  This recipe is not overly sweet, but sweet enough.

How many of my southern friends remember this recipe from their childhood? 


Sunday, August 31, 2014

Biscuits and Butter


I never skip breakfast.  And, for as long as I can remember, I have had an inclination for combining foods that perhaps weren't quite so traditional, particularly those that were sweet and salty. (This probably explains why my favorite candy bar when I was growing up was a Payday.)

I woke up this Sunday morning feeling hungrier than usual, wanting something more than cereal (my normal bowl of Mini Wheats Little Bites) and coffee (with a generous amount of International Delights Almond Joy coffee creamer stirred in), which is my typical breakfast of choice.


They are also whole grain, y'all.
 
To clarify that...I still had to have the coffee.  In my weekend mug, not the little weekday teacup.


I seriously don't know how I ever drank coffee without this.

Wandering into the kitchen, I found a plate full of biscuits and sausage patties that J. had prepared.   As I said, I am accustomed to eating cereal and not much more for breakfast.  I don't make a habit of eating food much heavier than that at the beginning of the day.

However, given my ravenous state, I decided to allow myself this treat - for that is what it was - and indulge in a little nostalgic decadence this morning.  Here's how it went:

First up...Karo syrup and butter.  (Margarine, to be specific, as I did not have any real butter on hand.)


Next....pour the syrup on the plate (while the buttered biscuits patiently wait) and top with 1 tablespoon of softened margarine.


 With a fork, mash and spread the butter around in the syrup.....


....until it becomes smooth and creamy, like this.  It takes a sort of whisking motion to accomplish this.


Dip that lovely biscuit bite into the buttery-syrupy-deliciousness.


Now let's make it even better and add a little Tennessee Pride sausage to the mix.
 
 
Wow.  So good.
 
I rarely eat sausage (or big ol' biscuits, for that matter) anymore.  It isn't that I don't like them....quite the contrary.  I just try to make healthier choices most days.  And bread of any kind is my frenemy.  I have a love/hate relationship with that one.
 
However, today was one of those days when I decided to indulge a little.
 
I used to do this - the mixing of the syrup and the butter - when I was little.  It wasn't always Karo syrup, though...it was usually Golden Eagle or Yellow Label syrup...staples of a southern table back in those days, I think.  It always was at our house, anyway.  I think the syrup bottle/jar may have had a permanent spot on the table, whether we were eating or not.  Even today, I generally keep one or the other of those brands in the house. 
 
Another sweet/salty treat I remember from being a child was a sandwich - soft white bread - with butter spread on one slice and topped with sprinkled granulated sugar.
 
I especially adore creamy grits with melted butter, salt..... and grape jelly stirred into them.  (Makes quite the colorful plate!)  It has to be grape.  I've tried apple jelly, and it will do in a pinch, but nothing else is acceptable to my particular palate.  It is rare that I eat grits without the addition of the jelly.  I also do this jelly thing with scrambled eggs at times (again, always grape).
 
A few other sweet and salty faves....French fries dipped in vanilla ice cream (or a Wendy's Frosty)....salt sprinkled on a juicy slice of watermelon...potato chips dipped in chocolate...peanut butter and honey...a sweet Margarita over ice with lots of salt on the rim of the glass...a slice of sharp Cheddar cheese dragged through syrup...and anything salted caramel. 
 
And I thought I was the only one!
 
Oh...and this is, by far, one of the best, and a forever favorite...a bag of salted peanuts dumped into a cold bottle of Coca-Cola.  That contoured glass bottle makes all the difference.  Don't ask me why....it just does.   Open the bottle, take a sip, and pour as many of those peanuts in the bottle as you can.
 
 
I'm thinking I need this right now!
 
Two foods that I love individually, but cannot tolerate together, however, are peanut butter and bananas.  Go figure.
 
What about you?  What unusual sweet and salty food combos are your favorites? 


Sunday, July 13, 2014

Broccoli Cornbread

Hey friends,

It's been a while (again) since I posted here.  Something about that "real job" keeps me from doing things I really like to do, such as trying out new recipes and sharing them with friends.

At the request of a couple of said friends, I found this recipe from our restaurant days (and before) that I think you will enjoy.  You can find variations of it all over the internet.  This is the one I use.

My first encounter with this cornbread was, sadly, when my maternal grandmother passed away, and one of my mother's friends from church baked it and brought it to her house.  The cornbread was cut in tiny squares, almost appetizer-like.  I don't remember the other food we received at that time, but this one stood out in my mind, and I located the recipe soon thereafter.

To me, "broccoli cornbread" (or, as my family has always referred to it, "broccoli bread") is a bit of a misnomer.  I almost want to call it "broccoli cake".  It has a sweetness to it, so much so that I consider it to be almost a dessert.  This recipe calls for 2 boxes of corn bread mix, which makes the texture very light and cake-like.  I have also baked it using 1 box of mix (with all other ingredients remaining the same), which yields a thinner, somewhat denser, bread.  It also uses cottage cheese, small chunks of which will still be visible after baking.

Before tonight, I hadn't baked this in quite some time.  While this is one of my favorite side dishes, the drawback to baking it is the smell that it leaves behind in the kitchen.  Sometimes that broccoli can hang in the air for a while, and not in a good way.  Having said that, if you've never tried it before, don't let that last statement cloud your opinion of this recipe.  Take a deep breath, turn on your kitchen exhaust fan or open a window, and start baking!  I promise you won't regret it.

Ingredients:

2 (8-1/2 oz.) packages sweet cornbread mix (I like to use Jiffy corn muffin mix)
4 eggs
1-1/2 cups (12 oz.) cottage cheese  (I have, at times, substituted sour cream with no adverse effects)
3/4 cup (1-1/2 sticks) butter or margarine, melted
3 cups frozen chopped broccoli, thawed
1 large onion, chopped
1 tsp. salt
2 cups cheese, shredded


In a large bowl (I used an 8-cup Pyrex measuring cup), beat eggs, cottage cheese and butter.   (Note:  I bought a 16-oz container of cottage cheese, which yielded exactly 1-1/2 cups.)


Add the corn bread mixes to the bowl.  I omitted the salt, but you can add it here.


Stir the corn bread mixes in, just until moistened.  Batter will appear lumpy.


At this point, I had to transfer the batter to a larger bowl.

Gently fold in the broccoli and onions.  (Use any onion that you prefer, or omit if you don't like them.)

Note:  I used 4 cups of frozen cut broccoli, unthawed.  The chunks are large, but you can always chop them smaller to get better distribution throughout the batter.  I also used 1 cup of frozen chopped Vidalia onions, unthawed.


Stir the (frozen) vegetables and corn bread mixes together.  It should look like this.


I always add cheese, although it is optional.  I prefer using extra sharp Cheddar.  I shredded half of an 8-ounce block, yielding 2 cups shredded cheese.

(Note:  To give this a Mexican twist, fold in diced jalapenos to taste.)


Pour the batter into a large lightly greased casserole dish or pan.  I used a foil casserole pan (11 3/4 " x 9 1/4"), but a regular 9" x 13" pan or casserole dish will do just fine.


Bake at 350 F. for 40-50 minutes, or until bread has browned on top and tests done.


And there you have it!  Doesn't it look delicious?

Oh, wait....here's one more picture.


Awesome!

This recipe yields 8 cups of batter.  If you prefer, you can divide the batter. Bake 4 cups in an 8x8 baking dish (you may need to reduce the total cook time) and freeze the remaining batter in a 4-cup freezer-safe container.  Simply thaw in the refrigerator and bake as directed.

Enjoy!


Sunday, April 6, 2014

Chicken, Cheese & Chocolate

Hey friends,

It's been a while since my last post...I started a new day job at the beginning of the year, which has been a huge adjustment for me in so many ways.  I've been a bit of a free spirit for the last 10 years; returning to the confines of corporate culture has not been easy and my focus had to shift for a while.
 
None of that, however, has anything to do with today's subjects....chicken, cheese and chocolate.....three of my favorite things!  I borrowed this topic from a magazine my mom gave me.  There are some quick and easy recipes here that I thought I would share with you.  Two of these recipes are from the Kraft Foods website.

 
Three-Cheese Chicken Penne Pasta


www.kraftrecipes.com


I love casseroles, and this one is made even better by using healthier, low fat ingredients.  This entrĂ©e has plenty of vitamin A from the spinach, as well as calcium from the cheeses. 

The recipe states that the yield is 4 servings at 2 cups/serving, and recommends using either an 8-inch baking dish or a 2-quart baking dish.  I think it may be better to use a 9x13 dish because the pasta is going to take up a lot of room.  You may also want to split it into two smaller 8x8 casseroles and freeze one for later.


Follow the link for the recipe:  Three-Cheese Chicken Penne Pasta


Tomato Basil Mozzarella Panini
 
 
For the cheese portion of today's topic, I'll share one of my own recipes that became quite popular at my restaurant.  I adapted the ingredients of a Caprese salad into a grilled cheese Panini sandwich.  It has such a unique flavor and is very easy to make.  Pair this up with a nice tomato soup for a delicious comfort-food experience.


So amazing!
You will need:


Good crusty sourdough bread (you can also substitute Italian, ciabatta, or focaccia)

Mayo

One or two Roma tomatoes, sliced in 1/4" slices

Basil pesto spread (I like Classico)

Mozzarella cheese, shredded

Olive oil cooking spray


Here's how to put this beauty together:


Preheat your sandwich or Panini grill.

Lightly drizzle mayonnaise on both slices of bread. 

Arrange sliced Roma tomatoes over the mayo.  I like to arrange them in a sort of cascade fashion, where one slightly overlaps the next one, getting maximum coverage on the bread.

Drizzle with basil pesto.

Sprinkle liberally with mozzarella cheese (you will achieve better results if you shred your own).

Top with second bread slice (mayo side down).

Spray the sandwich lightly with olive oil cooking spray.

Place on the grill for 2-3 minutes or until the bread is toasted and the cheese is melting.  We always grilled our sandwiches on the flat side of the grill, but you can also use the ridged side to get those lovely grill marks on the bread.

I like to put mayo, pesto, and other spreadables in plastic squeeze bottles.  You may need to snip the tip for spreads with a heavier texture, like this pesto or a tapenade, so they will flow more easily.

You can also make this as a non-grilled sandwich using fresh mozzarella slices and fresh basil.  I like using Roma (also known as plum) tomatoes because they contain less moisture than normal tomatoes and don't have as many seeds.

The secret to this sandwich!
www.classico.com


Marbled Brownies
 
 
Finally....chocolate.  Here is a dessert that was also a very popular item at the restaurant.  Fudgy brownies + cream cheese = a delicious combination of brownie and cheesecake.  It's okay in small bites, right? 
 
PHILADELPHIA Marble Brownies recipe
www.kraft.com

This is a really easy dessert - one of those you'd call "semi-homeade".  I like baking brownies in a metal pan as opposed to a glass dish.  My favorite is a 9x13 Wilton sheet cake pan. Use your favorite family-size brownie mix to start this off, although Kraft recommends you do not use the type that includes a syrup pouch.

Follow this link to the recipe:  Marble Brownies


Give these a try and let me know how you like them.

Enjoy!